Hi everyone! Sorry for the delay! I have been crafting like crazy, but nothing is finished and everything is in the works! Have you noticed how many different fabric flowers there are out there in the crafty corners of blogland? There are a million creative and darling tutorials out there! I love them because you can use them to embellish just about anything from clothes, to hair accessories to paper-crafts and gift treatments! Here are two ways which have a similar looking finished product.

The first steps in both flowers are the same. First you will need to cut out a bunch of circles in various sizes.

I have cereal box templates of every 1/2 diameter circle between 1 inch to 5 inches and I use them ALL THE TIME!

For these two flowers, you will need the following circles in three sizes in as many types of coordinating fabrics as you want. I used three. (I made these to match the
museum tote, can you tell?) You will also need to make a covered button- the kits are readily available wherever sewing notions are sold and are SO easy and quick to make. They are one of my very favourite things (Oh, no! Please stop me if I start sounding like Oprah!)

Set the largest and smallest circles aside and fold the eight others in half. This is where the similarities in making the two flowers end. From here on out, I will show you one type at a time.

Type A
Take your fabric half circles and overlap them like in the following photos until they form a circle.


Then add another layer (and even another if you feel so inclined).

Stack your layers on top of your largest single fabric circle and sew little stitches close to the middle, through all the layers of fabric. Sew your covered button on the top and you're finished!

This is the flatter and least fluffy of the two so I used mine as a brooch and sewed it directly onto my daughter's sweater using a small circle as a backing.

I also added a fabric yo-yo to the center of mine, just under the button, to hide my horrible stitching. I was really happy with how easy it was and how well it turned out!

Type B
Take your circles and fold the same eight in half (four each of two different sizes).

This next part is easy to do but hard to describe in words; there is some squishing and pinching until you get a fluffy quarter-circle. Just look at the next 4 pictures and hopefully it will make more sense than my horrific attempt at a description.


Perfect! Then, while I make the others, I like to squish them into a big book so they'll keep their shape.

When all the quarter-circles are made, sew them on the largest circle one by one using two simple stitches per piece starting with the largest 4 and then stacking the smaller 4 on the top.


Sew on your covered button and you're done!

This type is fuller and fluffier so I sewed it onto a clip to make one huge, honkin' barrette.


Warning: These are so easy to make and so versatile, you will want to make about a bajillion! And you will love everyone!! Happy flower making!!!!


 Now that the twins are almost 3, we have been starting to introduce some more formal preschool learning games. It will be fun to get the ol' preschool box of tricks out, and learn some new ones. Our favorite game lately has been "The Number Game." To play, we find some number cards and line them up at the other end of the room. We started by using some old flashcards, but they soon got ruined (I left them in my pocket and they didn't survive the wash- oops!) so we used the numbered UNO cards instead. I think they work even better because it incorporates the use of color into our game.
 After the cards are lined up, I call out a number and the kids take turns running across the room to the number line and bringing back the correct one. If they are having difficulty (6 and 9 are always a problem), we give them a hint by telling them the color.
 It works every time.
 The game ends when the attention spans start to dwindle or someone gets bored (usually me).
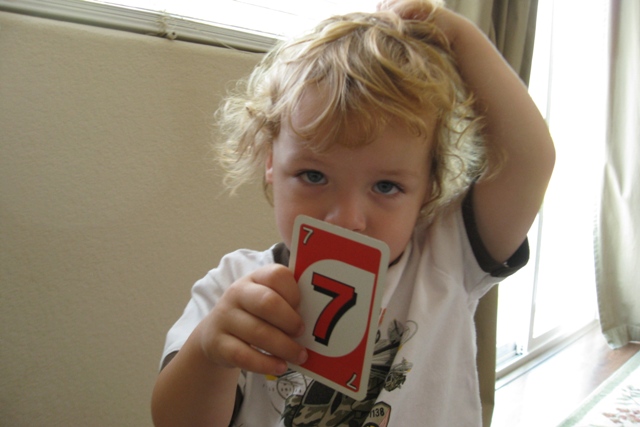 I love how it gets them active, teaches them to take turns and encourages them to root for each other to succeed. We seriously have been playing this A LOT and they are never sick of it. I think we will try it with shapes in the near future! I think I will start posting some of the other little games we do throughout the day to ward off boredom and promote learning. Stay tuned!